15-Minute Honey Garlic Shrimp (Easy Skillet Dinner)
15-Minute Honey Garlic Shrimp (Sweet, Savory & Speedy)
When you need dinner on the table fast, this **Honey Garlic Shrimp** recipe is your answer. From fridge to plate in just 15 minutes, this dish delivers restaurant-quality flavor with minimal effort and even less cleanup.
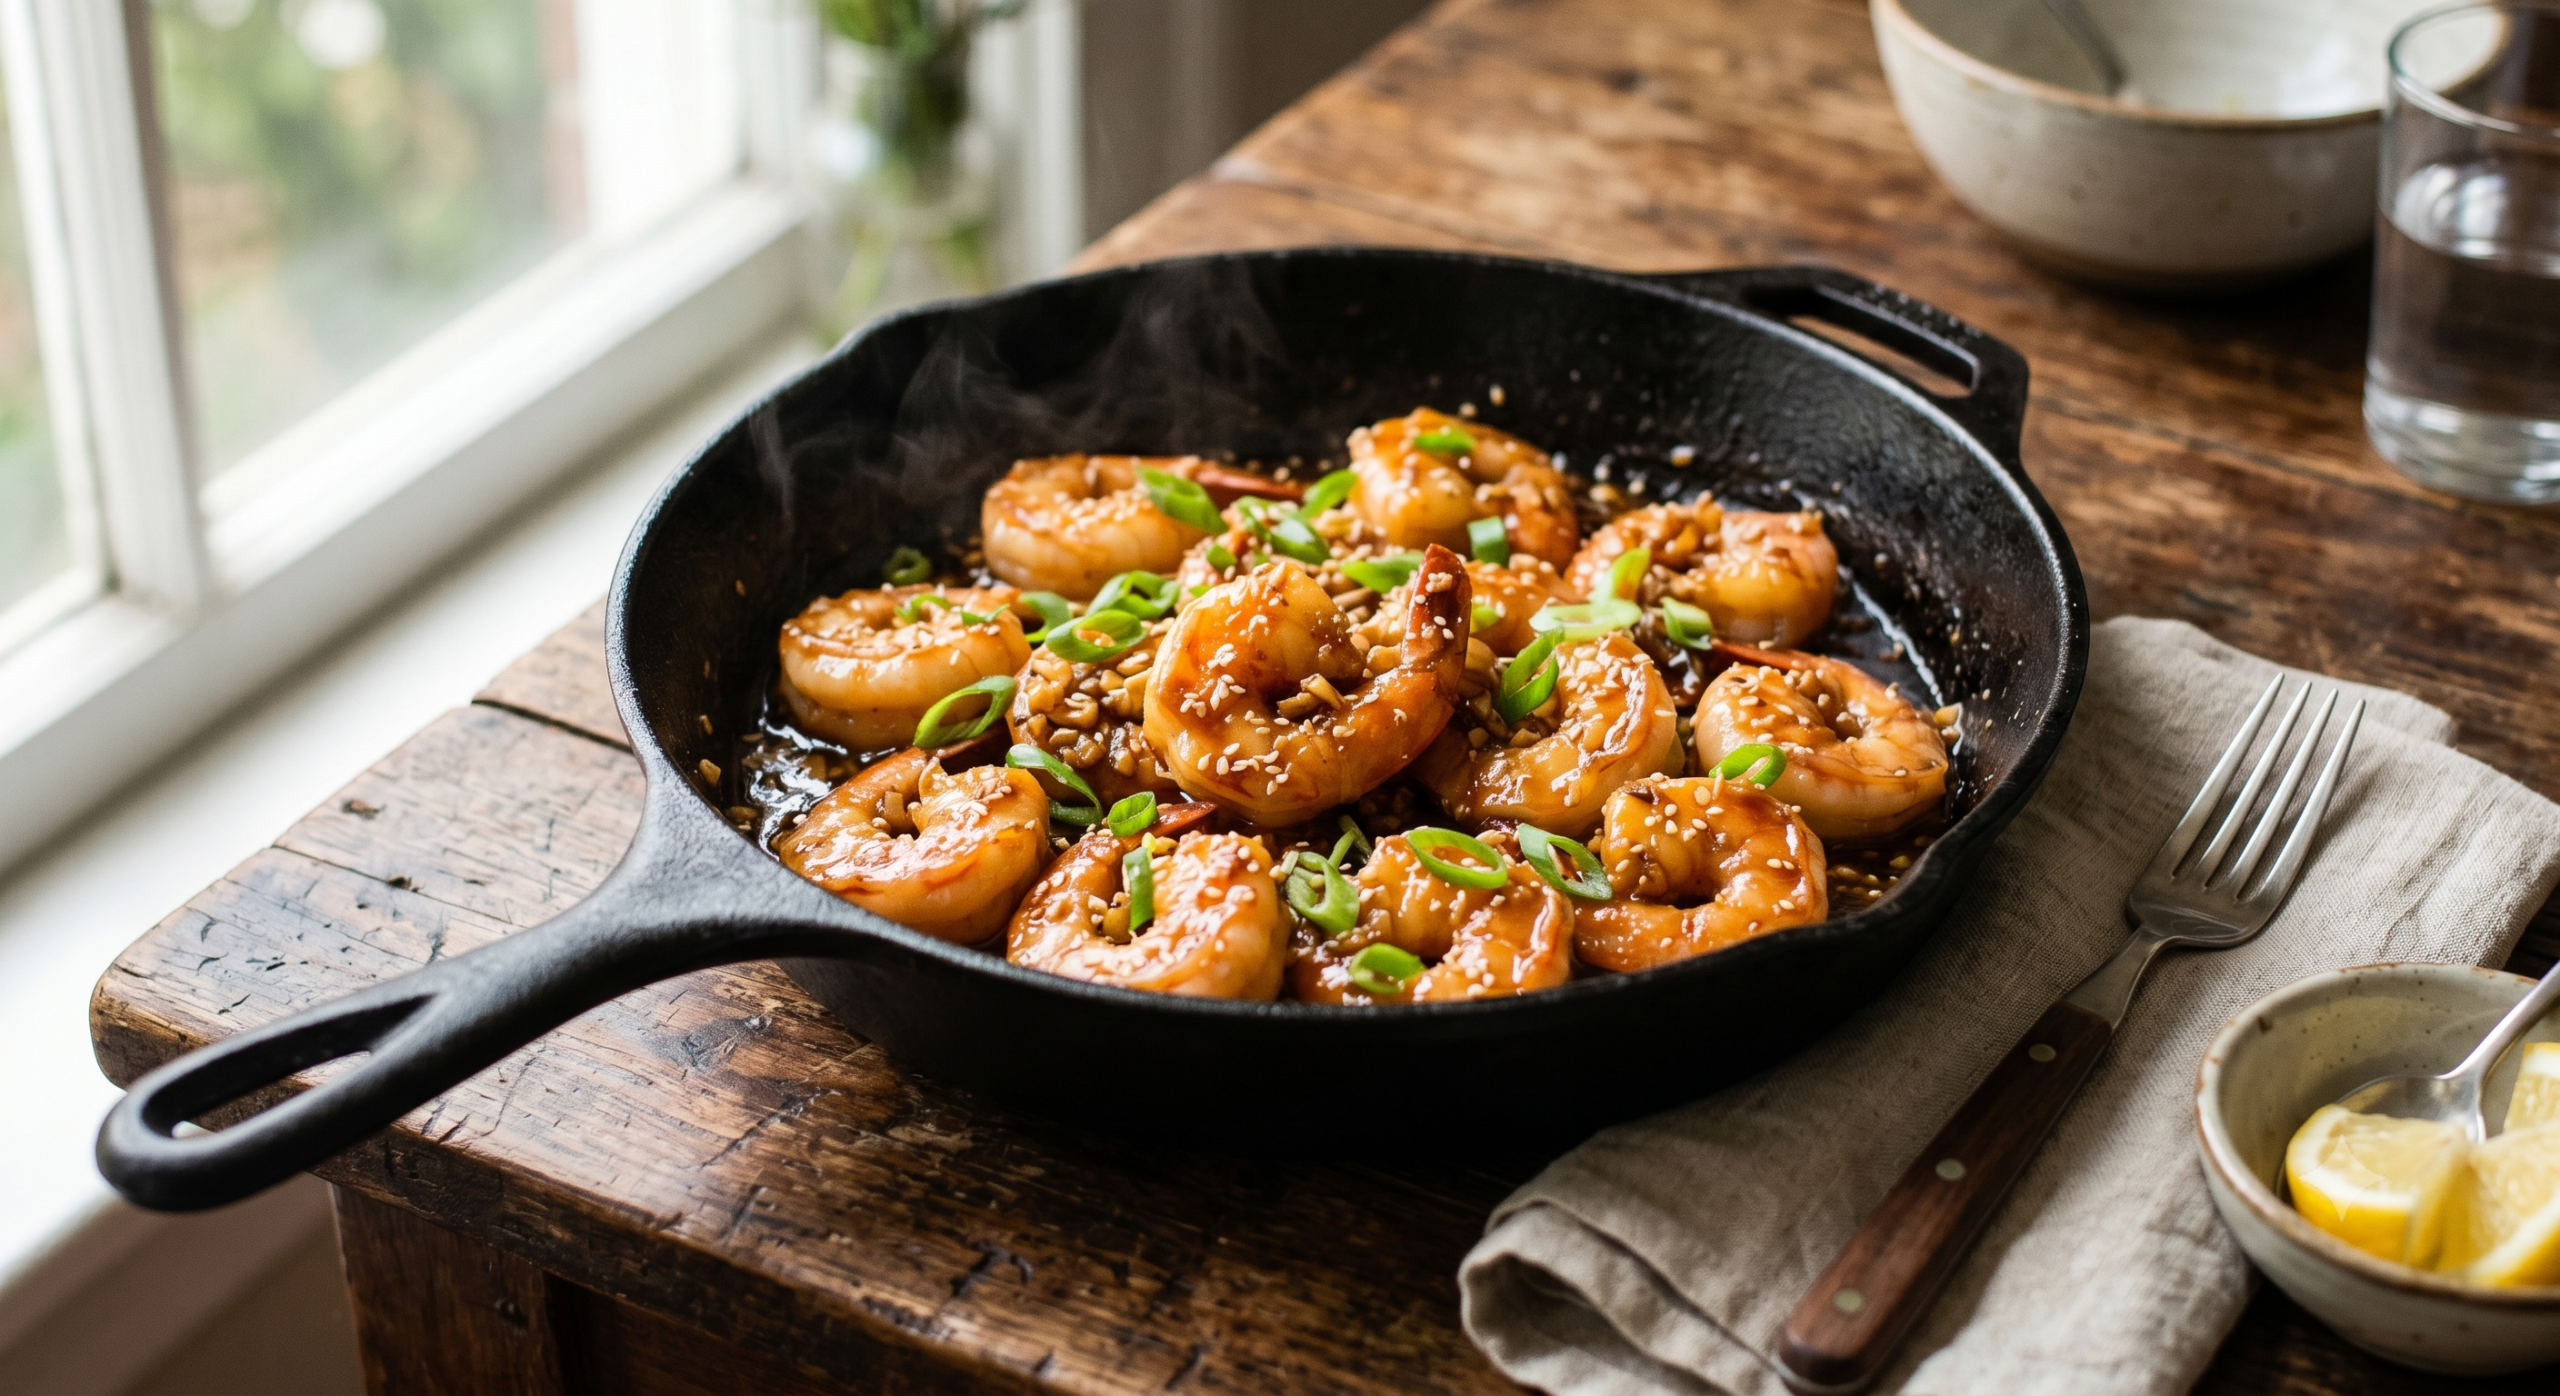
The magic lies in the sauce. Honey brings a beautiful caramelized sweetness, fresh garlic adds bold aromatic depth, and soy sauce provides that irresistible umami backbone. When tossed with plump, juicy shrimp and quick-seared in a hot skillet, the result is a glossy, sticky, flavor-packed meal that pairs with virtually anything.
At Edge Recipes, we designed this quick shrimp recipe for real life. Whether you forgot to plan dinner, got home late from work, or simply do not want to spend your evening washing dishes, this recipe has your back.
—
## Why You’ll Love This Honey Garlic Shrimp
– ✅ Ready in literally 15 minutes
– ✅ One skillet, minimal cleanup
– ✅ Better than takeout flavor
– ✅ High in protein, low in effort
– ✅ Pairs with rice, noodles, or veggies
This is the definition of a busy-weeknight lifesaver.
—
## Ingredients
### For the Shrimp:
– 1 lb large shrimp, peeled and deveined
– 1 tablespoon olive oil
– 1 tablespoon butter
– Salt and pepper to taste
### For the Honey Garlic Sauce:
– ¼ cup honey
– 3 tablespoons soy sauce
– 4 garlic cloves, minced
– 1 tablespoon lemon juice
– ½ teaspoon red pepper flakes (optional)
– 1 teaspoon cornstarch mixed with 1 tablespoon water (slurry)
### For Garnish:
– Sliced green onions
– Sesame seeds
– Fresh lemon wedges
—
## Step-by-Step Instructions
### Step 1: Prep the Shrimp
Pat the shrimp completely dry with paper towels. Moisture is the enemy of a good sear.
Season lightly with salt and pepper.
—
### Step 2: Make the Sauce
In a small bowl, whisk together honey, soy sauce, minced garlic, lemon juice, and red pepper flakes. Set aside.
Having the sauce ready before cooking is essential — shrimp cook so fast that you will not have time to measure ingredients later.
—
### Step 3: Sear the Shrimp
Heat olive oil in a large skillet over medium-high heat until shimmering.
Add shrimp in a single layer. Cook for **1 to 2 minutes per side** until pink and slightly golden. Do not overcrowd the pan; cook in batches if necessary.
Remove shrimp from the skillet and set aside.
—
### Step 4: Build the Sauce
Reduce heat to medium. Add butter to the same skillet.
Pour in the honey garlic sauce and let it bubble for about 30 seconds. Stir in the cornstarch slurry.
Simmer for 1 to 2 minutes until the sauce thickens and becomes glossy.
—
### Step 5: Toss and Coat
Return the cooked shrimp to the skillet. Toss vigorously to coat every piece in that sticky, glossy sauce.
Cook for just 30 seconds more to warm everything through.
—
### Step 6: Garnish & Serve
Remove from heat immediately to prevent overcooking. Top with sliced green onions, sesame seeds, and a squeeze of fresh lemon.
—
## What to Serve With Honey Garlic Shrimp
This versatile protein works with countless sides:
– Steamed white or brown rice
– Fried rice or cauliflower rice
– Buttered noodles or lo mein
– Sautéed broccoli or snap peas
– Fresh salad with ginger dressing
For a complete 15-minute meal, start your rice cooker first, then make the shrimp while it cooks.
—
## Pro Tips for Perfect Shrimp Every Time
✅ **Buy peeled and deveined shrimp** to save prep time.
✅ **Dry thoroughly** before searing — wet shrimp steam instead of brown.
✅ **Do not overcook.** Shrimp turn rubbery quickly. Remove them from heat the moment they turn opaque pink.
✅ **Use a hot pan.** A screaming hot skillet creates caramelization in seconds.
—
## Variations
### Spicy Honey Garlic Shrimp
Double the red pepper flakes and add 1 tablespoon sriracha to the sauce.
### Ginger Honey Shrimp
Add 1 tablespoon fresh grated ginger to the sauce for an Asian-inspired twist.
### Honey Garlic Shrimp Stir-Fry
Toss in bell peppers, snap peas, and carrots during the sauce step.
### Low-Carb Version
Serve over zucchini noodles or cauliflower rice instead of regular rice.
—
## Storage & Reheating
### Refrigerator:
Store in an airtight container for up to **2 days**. Shrimp are best enjoyed fresh but reheat reasonably well.
### Reheating:
Warm gently in a skillet over low heat with a splash of water. Avoid the microwave if possible — it toughens the texture.
—
## Frequently Asked Questions
### Can I use frozen shrimp?
Yes. Thaw completely under cold running water and pat very dry before cooking.
### Can I use pre-cooked shrimp?
It is not recommended. Pre-cooked shrimp will become rubbery when reheated in the hot sauce. Raw shrimp yield the best texture.
### Is this recipe gluten-free?
Use tamari or coconut aminos instead of soy sauce to make it gluten-free.
### How spicy is this dish?
As written, it is very mild. The red pepper flakes add just a hint of warmth. Adjust to your preference.
—
## Nutrition Information (Approximate Per Serving)
– Calories: 310
– Protein: 28g
– Carbs: 28g
– Fat: 9g
*Based on 4 servings without rice.*
—
## Final Thoughts
This **15-Minute Honey Garlic Shrimp** proves that fast food does not have to mean drive-thru food. With a handful of pantry staples and one hot skillet, you can have a sweet, sticky, protein-packed dinner ready before your delivery app would even find a driver.
For more lightning-fast meals that do not compromise on flavor, browse our full **Quick & Easy Recipes** collection on EdgeRecipes.com.
—
# 🍰 6️⃣ Classic No-Bake Cheesecake (Desserts & Sweet Treats)
**Category:** Desserts & Sweet Treats
**Primary Keyword:** No-Bake Cheesecake
**Secondary Keywords:** easy no bake cheesecake recipe, classic cheesecake without oven, summer dessert recipe, no bake cheesecake filling
**SEO Title:** Classic No-Bake Cheesecake (Easy Creamy Dessert)
**Meta Description:** Make the creamiest no-bake cheesecake with just 6 ingredients! Perfect for summer, holidays, or whenever you need an easy dessert.
**URL Slug:** /no-bake-cheesecake-recipe/
—
## Classic No-Bake Cheesecake (Creamy, Dreamy & Effortless)
Some desserts demand precision, water baths, and careful oven timing. This **No-Bake Cheesecake** demands none of that — yet delivers every bit of the creamy, tangy, luscious satisfaction you crave.
Perfect for hot summer days when you refuse to turn on the oven, this classic dessert comes together with just six simple ingredients. The filling is light yet rich, set perfectly by the magic of whipped cream and cream cheese, and sits atop a buttery graham cracker crust that provides the ideal textural contrast.
At Edge Recipes, we believe everyone deserves a show-stopping dessert that does not require culinary school. Whether you are hosting a dinner party, contributing to a potluck, or simply treating yourself on a Sunday afternoon, this **easy no-bake cheesecake recipe** is your ticket to dessert glory.
—
## Why You’ll Love This No-Bake Cheesecake
– ✅ No oven required
– ✅ Only 6 ingredients
– ✅ Make-ahead friendly
– ✅ Perfectly smooth and creamy texture
– ✅ Customizable with endless toppings
It is the ultimate stress-free dessert that still looks elegant on any table.
—
## Ingredients
### For the Graham Cracker Crust:
– 1½ cups graham cracker crumbs (about 12 full crackers)
– ⅓ cup granulated sugar
– 6 tablespoons unsalted butter, melted
### For the Cheesecake Filling:
– 16 oz cream cheese, softened to room temperature
– 1 cup powdered sugar, sifted
– 1 teaspoon vanilla extract
– 1 tablespoon fresh lemon juice
– 1½ cups heavy whipping cream, cold
—
## Step-by-Step Instructions
### Step 1: Make the Crust
In a medium bowl, combine graham cracker crumbs and sugar. Pour in melted butter and stir until the mixture resembles wet sand.
Press the mixture firmly into the bottom of a 9-inch springform pan or deep pie dish. Use the bottom of a measuring cup to pack it down evenly.
Refrigerate the crust while you prepare the filling. This helps it set and hold together when sliced.
—
### Step 2: Beat the Cream Cheese
In a large mixing bowl, beat the softened cream cheese with an electric mixer on medium speed until completely smooth and creamy — about 2 minutes.
Scrape down the sides of the bowl to eliminate lumps.
> **Pro Tip:** Room temperature cream cheese is non-negotiable. Cold cream cheese will leave lumps that no amount of mixing will fix.
—
### Step 3: Add Sugar and Flavorings
Add the sifted powdered sugar, vanilla extract, and lemon juice. Beat until fully combined and silky.
The lemon juice does not make the cheesecake taste like lemon. Instead, it brightens the cream cheese flavor and adds subtle complexity.
—
### Step 4: Whip the Heavy Cream
In a separate chilled bowl, whip the cold heavy cream with clean beaters on high speed until stiff peaks form. This takes about 3 to 4 minutes.
Stiff peaks mean the cream holds its shape when you lift the beaters.
—
### Step 5: Fold Together
Gently fold about one-third of the whipped cream into the cream cheese mixture to lighten it. Then fold in the remaining whipped cream carefully.
Use a spatula and a gentle hand — you want to maintain the airiness of the whipped cream. This is what gives no-bake cheesecake its signature cloud-like texture.
—
### Step 6: Fill and Chill
Pour the filling over the prepared crust. Smooth the top with an offset spatula.
Cover tightly with plastic wrap and refrigerate for at least **6 hours**, preferably overnight.
> **Patience is key.** The cheesecake needs time to firm up. Cutting too early results in a soupy slice.
—
### Step 7: Serve
Run a thin knife around the edge of the pan before releasing the springform sides.
Slice with a clean, sharp knife, wiping the blade between cuts for neat slices.
—
## Pro Tips for Success
✅ **Soften cream cheese properly.** Leave it out for 1 hour, or microwave unwrapped for 15 seconds.
✅ **Sift the powdered sugar.** Prevents lumps in the silky filling.
✅ **Chill the mixing bowl for whipped cream.** Cold equipment helps cream whip faster and hold shape longer.
✅ **Do not rush the chill time.** Minimum 6 hours; overnight is ideal.
—
## Topping Ideas
The beauty of this dessert is its versatility. Top your no-bake cheesecake with:
– Fresh strawberry sauce and sliced berries
– Blueberry compote
– Salted caramel drizzle
– Chocolate ganache
– Lemon curd
– Crushed Oreo cookies
– Toasted coconut flakes
Or serve it plain — the classic flavor stands beautifully on its own.
—
## Variations
### Chocolate No-Bake Cheesecake
Melt 8 oz of semisweet chocolate and fold it into the cream cheese mixture before adding whipped cream.
### Peanut Butter Cheesecake
Beat ½ cup creamy peanut butter into the cream cheese base.
### Citrus Cheesecake
Add 2 tablespoons lemon zest and ¼ cup lemon juice for a bright, tangy twist.
### Oreo Crust Version
Replace graham crackers with crushed Oreo cookies and reduce sugar to 2 tablespoons.
—
## Storage & Make-Ahead
### Refrigerator:
Cover and store for up to **5 days**. The flavor actually improves after the first day.
### Freezer:
Wrap individual slices or the whole cheesecake tightly and freeze for up to **2 months**. Thaw overnight in the refrigerator before serving.
This is an ideal make-ahead dessert for holidays and gatherings.
—
## Frequently Asked Questions
### Can I use Cool Whip instead of homemade whipped cream?
Yes, you can substitute 2 cups of stabilized whipped topping. However, homemade whipped cream provides superior flavor and a cleaner ingredient list.
### Why is my no-bake cheesecake runny?
Either the cheesecake did not chill long enough, or the whipped cream was not beaten to stiff peaks. Both are essential for structure.
### Can I make this in a pie dish instead of a springform pan?
Absolutely. A deep 9-inch pie dish works perfectly. You simply will not be able to remove the sides for presentation.
### Is no-bake cheesecake safe to eat?
Yes. Unlike traditional cheesecake, this version contains no eggs and requires no baking. The cream cheese and heavy cream are perfectly safe when kept refrigerated.
### Can I double this recipe?
Yes. Use a 9×13-inch pan and double all ingredients. Chill time remains the same.
—
## Nutrition Information (Approximate Per Slice)
– Calories: 420
– Protein: 5g
– Carbs: 32g
– Fat: 31g
*Based on 10 slices.*
—
## Final Thoughts
This **Classic No-Bake Cheesecake** is proof that the best desserts do not always require an oven, a thermometer, or culinary expertise. With a buttery crust and a cloud-like creamy filling, it is the kind of recipe you will memorize by heart and make for every occasion.
Dress it up or keep it simple — either way, expect empty plates and requests for the recipe.
For more irresistible sweets and easy desserts, explore our **Desserts & Sweet Treats** category on EdgeRecipes.com.