
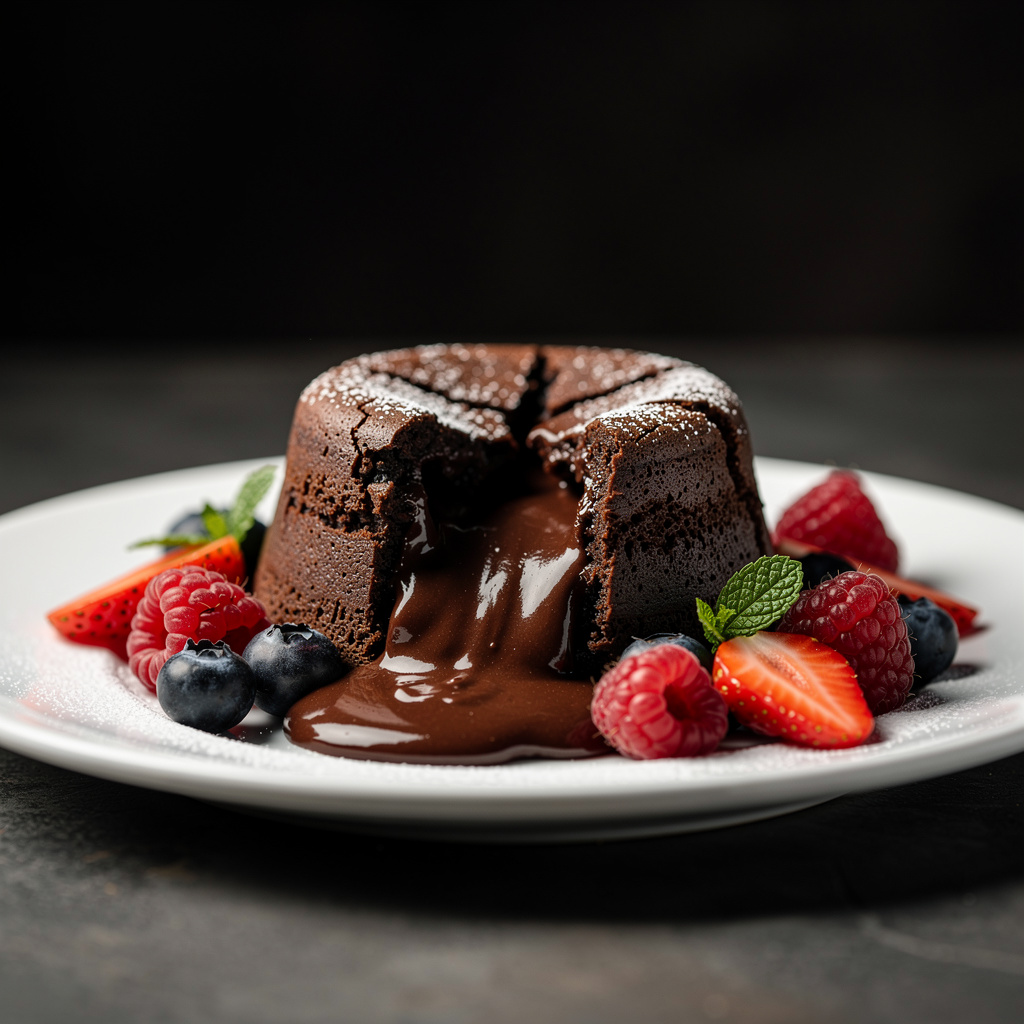
Chocolate Lava Cake (Easy Molten Center Dessert)
Chocolate Lava Cake (Restaurant-Quality at Home)
There are few desserts more impressive than cutting into a warm **Chocolate Lava Cake** and watching the rich, molten center flow onto the plate. It feels luxurious, elegant, and like something you should only order at a fancy restaurant.
But here is the truth: **chocolate lava cake is surprisingly easy to make at home.**
With just a handful of pantry staples and less than 30 minutes, you can create individual molten chocolate cakes that rival any high-end bistro. The secret lies in the timing and temperature — bake them just long enough for the outside to set while the center stays irresistibly gooey.
At Edge Recipes, we perfected this **easy chocolate lava cake recipe** so you get consistent results every time. Whether you are planning a romantic dinner, a dinner party, or simply treating yourself on a Tuesday night, this dessert delivers maximum impact with minimal effort.
—
## Why You’ll Love This Chocolate Lava Cake
– ✅ Ready from start to finish in under 30 minutes
– ✅ Uses just 6 simple ingredients
– ✅ Perfectly gooey molten center every time
– ✅ Naturally gluten-free adaptable
– ✅ Ideal for date nights, holidays, or special occasions
This is the kind of dessert that makes people think you spent hours in the kitchen.
—
## Ingredients
This recipe makes **4 individual lava cakes**. You will need:
– ½ cup (1 stick) unsalted butter, plus extra for greasing
– 6 oz high-quality bittersweet or semisweet chocolate, finely chopped
– 2 large eggs
– 2 large egg yolks
– ¼ cup granulated sugar
– 2 tablespoons all-purpose flour, plus extra for dusting
– ½ teaspoon vanilla extract
– Pinch of salt
– Optional: 1 teaspoon espresso powder (enhances chocolate flavor)
> **Pro Tip:** Use chocolate with 60–70% cacao for the best balance of sweetness and richness. Avoid chocolate chips; they contain stabilizers that prevent smooth melting.
—
## Step-by-Step Instructions
### Step 1: Prepare Your Ramekins
Preheat your oven to **425°F (220°C)**.
Grease four 6-ounce ramekins thoroughly with butter, making sure to coat every corner. Dust the inside of each ramekin with flour or cocoa powder, then tap out the excess.
This step is crucial. A well-greased ramekin ensures your lava cake releases cleanly onto the plate.
—
### Step 2: Melt the Chocolate and Butter
Combine the chopped chocolate and butter in a microwave-safe bowl. Microwave in 30-second intervals, stirring between each, until completely smooth and glossy.
Alternatively, use a double boiler: place the bowl over a pot of simmering water and stir until melted.
Set aside to cool slightly for 2–3 minutes.
—
### Step 3: Whisk Eggs and Sugar
In a separate large bowl, whisk together the whole eggs, egg yolks, and granulated sugar. Beat vigorously for about 1 minute until the mixture is pale, thick, and slightly frothy.
You are not trying to create meringue here — just incorporate air and dissolve the sugar.
—
### Step 4: Combine Chocolate and Egg Mixtures
Slowly pour the slightly cooled chocolate mixture into the egg mixture, whisking constantly.
Add the vanilla extract, salt, and espresso powder (if using). Stir until fully combined and silky.
> **Important:** Make sure the chocolate is not scalding hot, or it may cook the eggs.
—
### Step 5: Add the Flour
Sift the flour over the batter. Gently fold it in with a spatula until just combined.
Do not overmix. Overworking the batter at this stage can make the cakes dense rather than tender.
—
### Step 6: Fill the Ramekins
Divide the batter evenly among the prepared ramekins. Each should be about **¾ full**.
Place the ramekins on a small baking sheet for easy transfer into the oven.
—
### Step 7: Bake to Perfection
Bake for **12 to 14 minutes**. The edges should look firm and slightly puffed, while the centers still jiggle slightly when you gently shake the ramekin.
> **Critical Tip:** Every oven is different. Start checking at 11 minutes. If you overbake, you will have chocolate cake — still delicious, but not lava cake.
—
### Step 8: Invert and Serve
Let the cakes cool in their ramekins for **exactly 1 minute**.
Run a thin knife around the edges to loosen. Place a dessert plate over the top of the ramekin, then carefully flip it over. Gently lift the ramekin away.
Dust with powdered sugar and serve immediately while the center is warm and flowing.
—
## Pro Tips for the Perfect Lava Cake
✅ **Room temperature eggs** blend more smoothly into the batter.
✅ **Do not overbake.** The cakes will continue cooking from residual heat after removal.
✅ **Butter and flour aggressively.** Any missed spot will cause sticking.
✅ **Use a timer.** One minute can mean the difference between molten and cooked through.
✅ **Serve immediately.** Lava cakes wait for no one.
—
## Delicious Variations
Once you master the classic, try these decadent twists:
### Peanut Butter Lava Cake
Drop 1 teaspoon of peanut butter into the center of each ramekin before baking.
### Salted Caramel Center
Place a soft caramel candy in the middle of the batter. The result is a gooey caramel-chocolate hybrid.
### Mocha Lava Cake
Add 1 tablespoon instant espresso powder to the batter for a coffee-kissed flavor.
### White Chocolate Lava Cake
Swap bittersweet chocolate for high-quality white chocolate and serve with raspberry sauce.
### Flourless Version
Replace the flour with 1 tablespoon cornstarch for a naturally gluten-free dessert.
—
## What to Serve With Chocolate Lava Cake
This rich dessert pairs beautifully with:
– Vanilla bean ice cream (the classic pairing)
– Fresh whipped cream
– Raspberry or strawberry coulis
– Fresh berries
– A light dusting of powdered sugar
– Mint leaves for garnish
The contrast of warm cake and cold ice cream is simply unbeatable.
—
## Storage & Make-Ahead Instructions
### Make-Ahead Batter:
You can prepare the batter, fill the ramekins, cover tightly with plastic wrap, and refrigerate for up to **24 hours**. Bring to room temperature for 10 minutes before baking, then add 1–2 extra minutes to the bake time.
### Leftover Cakes:
Store baked lava cakes in the refrigerator for up to **2 days**.
### Reheating:
– **Oven:** Warm at 350°F for 8–10 minutes.
– **Microwave:** Heat for 20–30 seconds. The center may not be as runny, but the cake will still be delicious.
—
## Frequently Asked Questions
### Can I make chocolate lava cake without ramekins?
Yes. You can use a muffin tin. Grease and flour the cups well, fill ¾ full, and reduce baking time to about 8–10 minutes. However, ramekins yield the most impressive presentation.
—
### Why didn’t my lava cake have a molten center?
You likely overbaked it. Remember: the center should still jiggle when you remove it from the oven. The cakes continue cooking as they cool for that critical 1 minute.
—
### Can I use cocoa powder instead of melted chocolate?
No. Cocoa powder does not provide the fat content or melted texture needed for the lava effect. Solid chocolate is essential for this recipe.
—
### Is chocolate lava cake gluten-free?
This recipe contains a small amount of flour. However, you can substitute cornstarch or a 1-to-1 gluten-free flour blend to make it gluten-free without sacrificing texture.
—
### Can I freeze lava cakes?
We do not recommend freezing baked lava cakes, as the texture suffers. However, you can freeze the unbaked batter in ramekins. Thaw overnight in the refrigerator before baking.
—
## Nutrition Information (Approximate Per Cake)
– Calories: 420
– Protein: 6g
– Carbs: 34g
– Fat: 30g
– Sugar: 24g