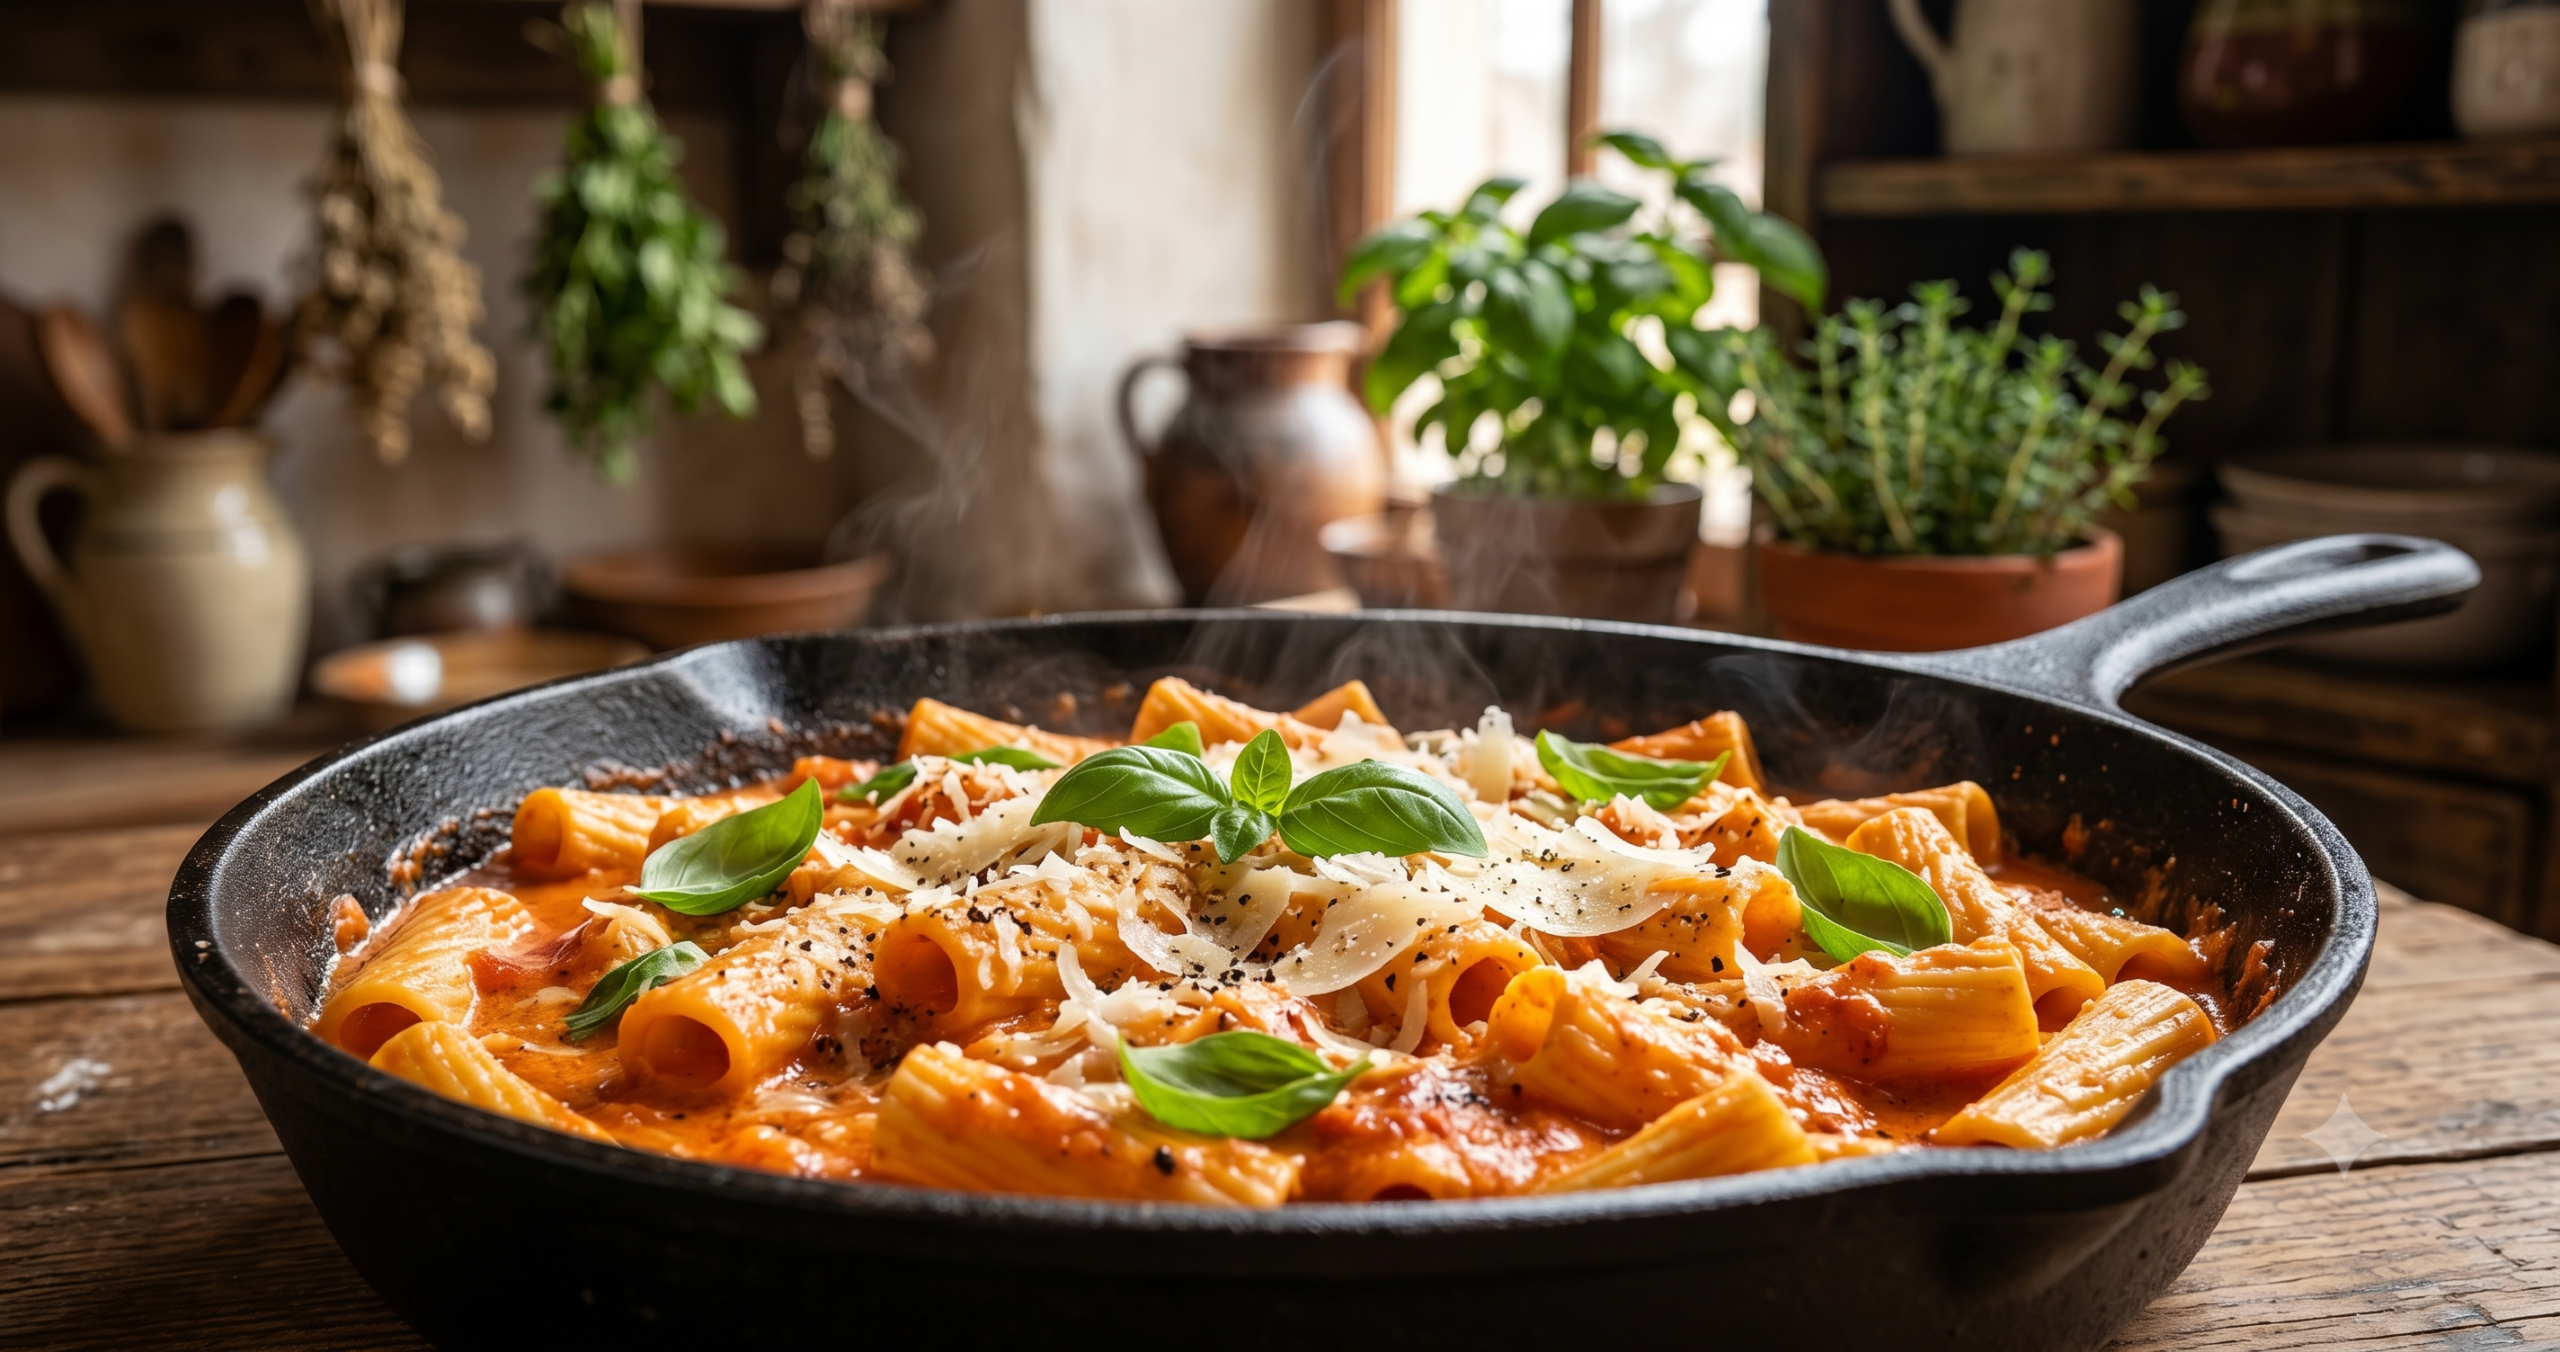
One-Pot Creamy Tomato Pasta (Easy 30-Minute Dinner)
EOne-Pot Creamy Tomato Pasta (The Ultimate Weeknight Dinner)
If you need a **fast, delicious, and easy cleanup dinner**, this **One-Pot Creamy Tomato Pasta** is your new best friend. Everything cooks together in a single pot — pasta, sauce, and cheese — creating a rich, cohesive dish that tastes like you spent hours simmering, but actually takes about **25 minutes from start to finish**.
This recipe is a game-changer for busy weeknights. No boiling pasta separately. No dirty multiple pots. Just one pot, simple ingredients, and maximum flavor with minimal effort.
The creamy tomato sauce clings to every noodle, thanks to the starch released from the pasta as it cooks directly in the sauce. The result is a perfectly emulsified, restaurant-quality pasta dish that feels indulgent but is shockingly easy.
Let’s make dinner easy.
—
## Why This One-Pot Pasta Is a Must-Make
✅ **True one-pot meal** (pasta cooks in the sauce)
✅ **Ready in 25–30 minutes**
✅ **Minimal cleanup** (only one pot!)
✅ **Creamy without heavy cream** (uses Parmesan and pasta water)
✅ **Family-friendly and customizable**
Perfect for beginners, students, busy parents, and anyone who hates doing dishes.
—
## Ingredients (Serves 4)
### For the Pasta & Sauce:
– 12 oz (340g) **short pasta** (penne, fusilli, or rigatoni)
– 1 tablespoon **olive oil**
– 1 small **onion**, finely diced
– 4 **garlic cloves**, minced
– 1 (28 oz / 800g) can **crushed tomatoes**
– 2 cups **chicken or vegetable broth**
– 1 teaspoon **dried oregano**
– 1 teaspoon **dried basil**
– ½ teaspoon **red pepper flakes** (optional)
– 1 teaspoon **salt**
– ½ teaspoon **black pepper**
– ½ cup **grated Parmesan cheese**, plus more for serving
– ¼ cup **heavy cream** or **half-and-half** (optional for extra creaminess)
– Fresh **basil leaves**, torn, for garnish
—
## Step-by-Step Instructions
### Step 1: Sauté Aromatics
In a large, deep pot or Dutch oven, heat olive oil over medium heat. Add diced onion and cook for 3–4 minutes until softened. Add minced garlic and cook for 30 seconds until fragrant.
—
### Step 2: Add Liquids & Seasonings
Pour in crushed tomatoes, broth, oregano, basil, red pepper flakes (if using), salt, and pepper. Stir to combine.
—
### Step 3: Add Pasta
Add **dry pasta** directly to the pot. Stir to submerge all pasta in the liquid.
—
### Step 4: Bring to a Boil, Then Simmer
Bring the mixture to a boil. Once boiling, reduce heat to a steady simmer. Cook for **12–15 minutes**, stirring occasionally, until pasta is al dente and the sauce has thickened.
*Important:* The pasta will absorb most of the liquid. If the sauce becomes too thick before pasta is done, add a splash more broth or water.
—
### Step 5: Finish with Cheese & Cream
Once pasta is cooked, remove from heat. Stir in Parmesan cheese until melted. For extra creaminess, stir in heavy cream now.
Taste and adjust seasoning.
—
### Step 6: Serve Immediately
Divide into bowls. Top with extra Parmesan, fresh basil, and a drizzle of olive oil.
—
## Why This Method Works (The Science)
– **Pasta starch** released during cooking emulsifies with the tomato broth and cheese, creating a creamy sauce without needing a roux or lots of cream.
– **Cooking pasta in the sauce** allows it to absorb flavor deeply.
– **One-pot cooking** means all flavors meld together perfectly.
—
## Common Mistakes & Fixes
❌ **Sauce too thin** → Let it simmer uncovered for 2–3 more minutes.
❌ **Sauce too thick / pasta undercooked** → Add ½ cup broth or water, continue simmering.
❌ **Pasta sticking to pot** → Stir frequently, especially in the last 5 minutes.
❌ **Cheese clumps** → Remove from heat before adding cheese; residual heat melts it smoothly.
—
## Delicious Variations
### 1. **One-Pot Chicken Alfredo Pasta**
– Skip tomatoes. Use 2 cups chicken broth + 1 cup milk or half-and-half.
– Add cooked shredded chicken in the last 3 minutes.
– Use mozzarella and Parmesan.
### 2. **Spicy Arrabbiata One-Pot Pasta**
– Increase red pepper flakes.
– Add ½ cup white wine with the broth.
– Finish with fresh parsley instead of basil.
### 3. **Vegetable-Packed Version**
– Add sliced mushrooms, zucchini, or spinach with the onions.
– Use vegetable broth for vegetarian.
### 4. **Cheesy Bacon & Tomato**
– Cook 4 slices chopped bacon first, remove, then sauté onions in bacon fat.
– Add bacon back with the cheese at the end.
### 5. **Gluten-Free**
– Use gluten-free pasta (may need 1–2 extra minutes cooking time).
– Ensure broth and cheese are GF.
—
## Storage & Reheating
– Refrigerate leftovers in an airtight container for up to 3 days.
– Reheat on stovetop with a splash of broth or water to loosen sauce.
– Microwave covered with a damp paper towel.
– *Note:* Pasta will absorb more liquid as it sits — add moisture when reheating.
—
## Nutritional Info (Per Serving, Approximate)
– Calories: 420
– Protein: 16g
– Carbs: 62g
– Fat: 10g
– Fiber: 6g
—
## Frequently Asked Questions
### **Can I use any pasta shape?**
Short pasta works best (penne, fusilli). Long pasta like spaghetti can break and become messy.
—
### **Can I make this ahead?**
Not ideal — pasta continues absorbing sauce. Best made fresh. You can prep veggies ahead, but cook day-of.
—
### **Why is my sauce watery?**
You may have added too much broth initially, or your pot isn’t large enough (use at least 5–6 quart pot). Simmer uncovered to reduce.
—
### **Can I freeze it?**
Not recommended — pasta texture changes. Freeze sauce separately, then combine with freshly cooked pasta.
—
### **Is it safe to cook pasta in broth?**
Yes — the broth comes to a boil and cooks the pasta thoroughly. The pasta water also helps thicken the sauce.
—
## Why One-Pot Meals Are Perfect for Beginners
This recipe teaches several fundamental techniques:
– Sautéing aromatics
– Simmering and reducing liquids
– Emulsifying sauces with starch
– Balancing seasonings
All in one pot, with less stress and mess.
—
## Final Thoughts
This **One-Pot Creamy Tomato Pasta** is the ultimate weeknight hero. It’s the kind of recipe that seems too easy to be good — but delivers every time. With minimal effort, one pot, and ingredients you probably already have, you can have a comforting, creamy, satisfying dinner on the table in half an hour.
If you love easy dinners that don’t skimp on flavor, this belongs in your regular rotation. For more quick wins, browse our **Quick & Easy Recipes** category on EdgeRecipes.com.
—
# 🥑 6️⃣ Rainbow Buddha Bowl with Peanut Lime Dressing (Healthy & Clean Eating)
**Category:** Healthy & Clean Eating
**Primary Keyword:** Rainbow Buddha Bowl
**Secondary Keywords:** healthy buddha bowl recipe, vegan buddha bowl, meal prep bowls, peanut lime dressing
**SEO Title:** Rainbow Buddha Bowl Recipe (Vegan & Packed with Nutrients)
**Meta Description:** This vibrant rainbow Buddha bowl is vegan, meal-prep friendly, and loaded with fresh veggies, protein, and a tangy peanut lime dressing.
**URL Slug:** /rainbow-buddha-bowl-recipe/
—
## Rainbow Buddha Bowl (A Nutrient-Packed, Colorful Clean Eating Meal)
If you think healthy eating is boring, this **Rainbow Buddha Bowl** will change your mind. Bursting with color, texture, and bold flavors, this plant-powered bowl is a complete meal that nourishes your body and delights your senses.
Buddha bowls are all about balance: complex carbs, plant-based protein, healthy fats, and a rainbow of vegetables — all topped with a flavorful dressing. This version features a **creamy peanut lime dressing** that ties everything together with tangy, savory, and slightly spicy notes.
Perfect for meal prep, vegan/vegetarian diets, or anyone wanting a light yet satisfying lunch or dinner. It’s naturally gluten-free, dairy-free, and packed with fiber, vitamins, and minerals.
Let’s build your bowl.
—
## Why This Rainbow Buddha Bowl Works
✅ **Complete plant-based nutrition**
✅ **Meal prep friendly** (components store separately 4–5 days)
✅ **Customizable** (use what you have)
✅ **Vibrant and appetizing**
✅ **High in fiber and protein**
A true clean eating powerhouse.
—
## Components of the Bowl (Build-Your-Own Style)
### 1. **Base (Choose One)**
– 1 cup cooked **quinoa** (or brown rice, millet, couscous)
– 1 cup **mixed greens** (kale, spinach, arugula)
### 2. **Protein (Choose One or More)**
– 1 cup **chickpeas**, roasted
– 1 cup **tofu**, baked or pan-fried
– 1 cup **black beans**
– ½ cup **edamame**
– ½ cup **lentils**
### 3. **Rainbow Vegetables (At Least 3 Colors)**
– **Red:** bell peppers, cherry tomatoes, shredded red cabbage
– **Orange:** carrots, roasted sweet potato
– **Yellow:** corn, yellow bell pepper
– **Green:** cucumber, broccoli, avocado, spinach
– **Purple:** purple cabbage, beets
– **White:** onion, mushrooms, cauliflower
### 4. **Healthy Fats**
– ¼ **avocado**, sliced
– 2 tablespoons **pumpkin seeds** or sunflower seeds
– 1 tablespoon **hemp hearts**
### 5. **Peanut Lime Dressing (Recipe Below)**
—
## Peanut Lime Dressing (Makes ¾ cup)
### Ingredients:
– ⅓ cup **natural peanut butter** (or almond butter)
– 3 tablespoons **lime juice** (about 1–1½ limes)
– 2 tablespoons **soy sauce** or tamari (for gluten-free)
– 1 tablespoon **maple syrup** or agave
– 1 **garlic clove**, minced
– 1 teaspoon **grated ginger**
– 2–4 tablespoons **water** (to thin)
– ½ teaspoon **sesame oil**
– ¼ teaspoon **red pepper flakes** (optional)
### Instructions:
Whisk all ingredients together in a small bowl until smooth. Add water 1 tablespoon at a time until desired consistency (thick but pourable). Store in fridge up to 5 days.
—
## Step-by-Step Bowl Assembly
### 1. **Prepare Components**
– Cook your chosen base (quinoa, rice, etc.).
– Roast or prepare your protein (chickpeas, tofu, beans).
– Chop all vegetables into bite-sized pieces.
– Make the peanut lime dressing.
### 2. **Arrange in Bowl**
In a large bowl, artfully arrange:
– Base (quinoa or greens)
– Protein(s)
– Rainbow vegetables
– Healthy fats
### 3. **Drizzle & Serve**
Drizzle generously with peanut lime dressing. Sprinkle with extra seeds or herbs.
—
## Meal Prep Guide
This bowl is **ideal for weekly meal prep**:
1. **Store components separately** in airtight containers:
– Base (quinoa)
– Protein (chickpeas/tofu)
– Veggies (raw or roasted)
– Dressing (separate)
– Avocado (add fresh day-of to prevent browning)
2. **Assemble fresh each day** — keeps veggies crisp and prevents sogginess.
—
## Nutritional Powerhouse Breakdown
### **Quinoa Base:**
– Complete protein (all 9 essential amino acids)
– High fiber, iron, magnesium
### **Chickpeas/Beans:**
– Plant protein, fiber, folate
### **Rainbow Veggies:**
– Different colors = different phytonutrients/antioxidants
– Vitamin C, A, K, potassium
### **Peanut Lime Dressing:**
– Healthy fats from peanut butter
– Vitamin E, magnesium
– Anti-inflammatory ginger & garlic
—
## Customization Ideas
### **Protein Swaps:**
– Grilled chicken or salmon (non-vegan)
– Hard-boiled eggs
– Tempeh
### **Dressing Alternatives:**
– **Tahini Lemon** (for nut-free)
– **Creamy Avocado Cilantro**
– **Balsamic Vinaigrette**
### **Kid-Friendly:**
– Use familiar veggies (carrots, cucumbers, corn)
– Swap peanut butter for sunflower seed butter
– Make dressing less spicy
### **High-Protein Boost:**
– Add 1 scoop collagen or plant-based protein powder to dressing
– Include double protein portion
—
## Common Mistakes to Avoid
❌ **Overdressing** — start with 2–3 tbsp dressing, add more if needed.
❌ **Using soggy veggies** — pat dry washed veggies; roast instead of boiling.
❌ **Skipping the acid** — lime juice brightens everything.
❌ **Not prepping components** — chopping everything ahead makes assembly fast.
—
## Storage Tips
– **Prepped components** last 4–5 days in fridge.
– **Dressing** lasts 5–7 days.
– **Assembled bowl** (with dressing) is best eaten within 24 hours to keep veggies crisp.
—
## Nutritional Information (Approximate Per Bowl, with quinoa, chickpeas, 3 veggies, avocado, dressing)
– Calories: 550
– Protein: 22g
– Carbs: 65g
– Fat: 22g
– Fiber: 15g
—
## Frequently Asked Questions
### **Can I make this nut-free?**
Yes! Use sunflower seed butter or tahini in dressing. Skip nuts as topping; use seeds instead.
—
### **Is this good for weight loss?**
Yes — high fiber and protein keep you full. Control portions by adjusting base and dressing amounts.
—
### **Can I use frozen vegetables?**
Yes, but thaw and pat dry to avoid sogginess. Roasting frozen veggies works too.
—
### **What if I don’t have peanut butter?**
Use any nut/seed butter (almond, cashew, sunflower). Or make a simple lime-tahini dressing.
—
### **How do I make tofu crispy?**
Press tofu 30 minutes, cube, toss in cornstarch, bake at 400°F for 20 minutes, flipping halfway.
—
### **Can I add grains like farro?**
Absolutely — any whole grain works (farro, barley, bulgur).
—
## Why “Buddha Bowls” Are Trending
– **Customizable** for all diets (vegan, GF, etc.)
– **Meal prep friendly**
– **Instagram-worthy** colors
– **Nutrient-dense**
– **No recipe “rules”** — encourages creativity
They represent mindful eating — colorful, balanced, and intentional.
—
## Final Thoughts
This **Rainbow Buddha Bowl** is more than a recipe — it’s a template for healthy eating. Once you understand the components (base, protein, veggies, fats, dressing), you can create endless variations with whatever fresh ingredients you have.
It’s perfect for anyone wanting to eat more plants, meal prep efficiently, or simply enjoy a vibrant, satisfying bowl that tastes as good as it looks.
For more nourishing bowls and clean eating ideas, explore our **Healthy & Clean Eating** category on EdgeRecipes.com.